The BEST File Manager for Windows
Works with and greatly enhances:
Windows 11, 10
Windows 8, 7, Vista, XP
Servers 2003 and later
Starting at just $50 for home use and $69 for a business license (and a business two-pack for just $99!)
What's New / What's Up
Version 4: the future
Major new tools, significant upgrades to current components and faster folder listings.
- Find and rename problem files: bad paths, illegal characters, Linux & iOS (Mac) characters.
- Check files and folders for compliance with different file systems e.g., NTFS, Fat-16, Fat-32, eFat, CDs, iOS, Linux and custom.
Know if the files are right before you copy. - Delete files no matter their length or how they are named.
- Powerful renaming with RegEx e.g. change 'Romeo Smith' into 'Smith, Romeo' and much more.
- Lightening fast directory listing no matter how large the folder.
- Detailed reports for copy errors.
- Variable text size for views and dialogs.
- and many more improvements and fixes..
See the V4 preview here.
Update May 2017
A May 2017 Microsft security update for Windows 10 conflicted with a major routine in FileBoss resulting in FileBoss not starting on some Windows 10 systems.
Versions V3.101 and later, fix the problem. You can read more about this at the page
Windows Creators Conflict.
Replace Characters in Filenames
Whether you want to add sequential numbers, change case, change extensions, remove or convert spaces, add folder names or each file's time to its name FileBoss has a quick and easy routine for doing so. And whether you are renaming files just a few at a time or batch rename by the thousands the routines work exactly the same.
How to rename files by replacing text
1) Select the files you want to rename by adding text
(or select the topmost folder containing them)
In the following example we have selected six html file that we want to rename from xxxx to henryviii xxxx to make them consistent with the names of other plays on our system.

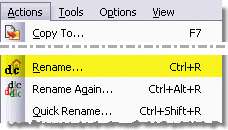
2) Select Actions > Rename... from the main menu
3) Select the Search & Replace tab
The display below shows all the tabs. It is important to remember that when the OK button is pressed only the settings in the current tab - in this case the Search & Replace tab - will be used to rename the files.

- Select this Search & Replace panel from the list on the left side.
- Enter the text to find and the text to replace it with.
- If wanted check the Replace all box. When Replace all is not checked only the first occurence of any matched text will be replaced.
Note that you don't have to worry about getting this exactly right as FileBoss will display a confirmation box before renaming any files and this box will show you the original name and the new name. In addition you can make changes to the new names before FileBoss renames anything.
4) Confirm the renamed files
After pressing the OK button in the above step, FileBoss will find the first file to be renamed and display a confirmation dialog similar to the one below.
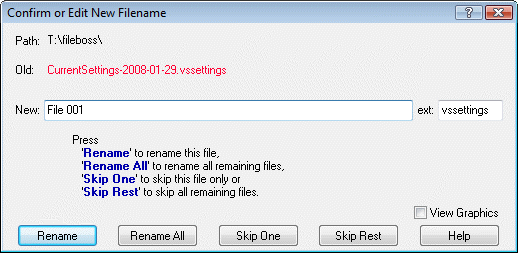
You can continue to rename or skip each file individually or at any time you can Rename All the rest of the files or Skip Rest thus ending the renaming.
Note that you can edit the new name anyway you like and then press the Rename button giving you total control over how the file is named.
5) See the results
When FileBoss has finished renaming the files the new names will appear immediately in the Contents window.

 What do you need to do today?